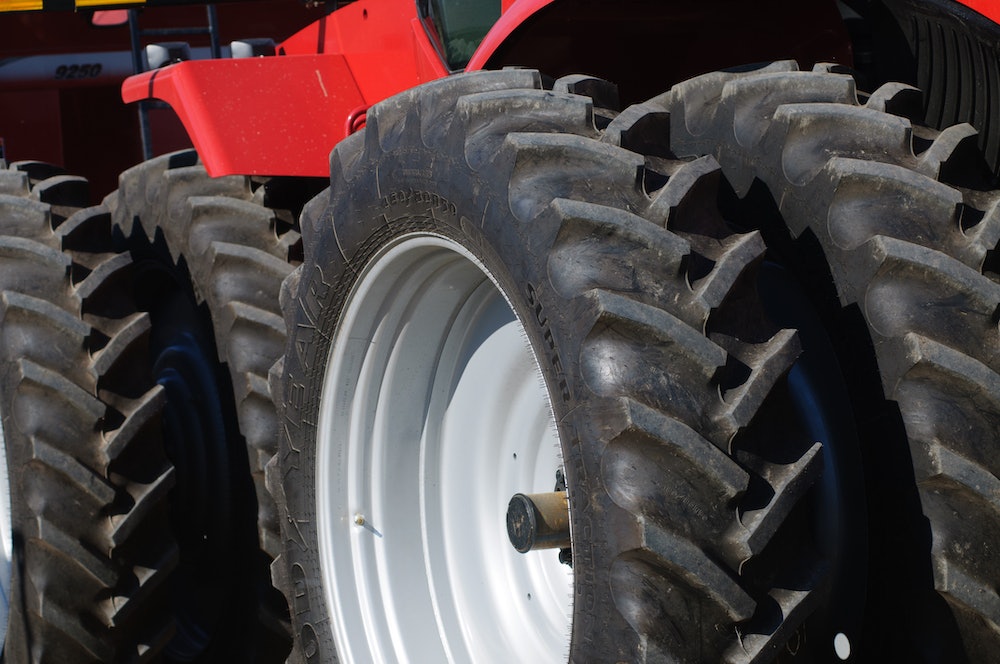
Tires play a critical role in the efficient and effective operation of your tractor. As with all components on your equipment, they also need regular inspection and maintenance to make sure they are operating at peak efficiency, as well as to help head off any problems that could lead to premature wear and unexpected downtime.
We had the opportunity to visit with Brad Harris, Manager of Global Agricultural Field Engineering at Firestone Ag, who provided us a handy seven-step checklist to ensure you are getting the most out of your tire investment.
Check the tire pressure
Running a tire at the effective tire pressure means running at the minimum inflation pressure to carry the load, which generates the largest footprint and provides the most traction out in the field. Going below these recommended levels can cause damage to the tire. But in operations where one tractor may do several different jobs, its important to match the tires inflation pressure with the job at hand.
Harris recommends producers use a tire inflation calculator to make the job easier. The calculator asks the customers to enter the tire size, the tire setup (singles, duals or triples) and the axle weight based on the job and the implement and the calculator will provide the minimum recommended inflation pressure, Harris says. The producer can then adjust tire pressure based on the job.
And when talking about measuring tire pressure, Harris stresses that an accurate gauge is critical. I stress to customers that if you are not putting calcium chloride or beet juice in the tire, use a digital inflation pressure gauge that you would find at any auto parts store or any box hardware store in that $15 to $25 range, he says. I have found these to be highly accurate, and a much better measurement of tire pressure than the $1 stick gauge. Its a small investment for a $4,000 tractor tire.

If youre not comfortable with a digital gauge, Harris says low-pressure analog gauges are available. Were talking about very small pressure differences, and its something that a stick gauge may not accurately measure, he says.
Check for cuts or damage to sidewall
Regular tire inspection should become a standard activity. Look for cracks or damage to the sidewall, especially when getting ready for planting or harvest season. Superficial cuts and snags are OK and those tires are still good to use and there should not be any performance issues. Harris says. But if we're seeing a cut that extends into the body ply material we need to look at removing that tire from service. That fabric ply is what gives the tire strength. If we are exposing those materials we risk damage which ultimately means a flat tire. So, if were seeing fabric materials, thats an indication to me that we need to replace that tire so we dont have downtime in the field.
Check the tire treads
Visual inspection includes checking the tire treads. Consider replacing the tire if theres less than 20 percent of the tire tread left. Running with less than 20 percent tread can cause traction issues in wetter soil conditions. If you are operating in a dry environment, then running at less than 20 percent might be OK, Harris says. But in areas like the Midwest, less than 20 percent tread means less traction and more slip in wet soil conditions.
This is one of those preventative maintenance things, he adds. If we're noticing that we're starting to see reduced tire tread, that allows us to look at our replacement schedule and say the tire treads are starting to get to the point where I need to budget for replacing tires on this piece of equipment.
Check for stubble damage and exposed cords
Similar to visual tire sidewall inspection, checking for stubble damage in the tread area. The tread area is going to experience the most stubble damage, Harris says. Many times when we see stubble damage it looks poor on the tire. But typically most tires have a very thick base and we have to see significant damage before it gets into the body ply material. If we are not seeing any exposed cords, those tires can still remain in service. When you see belt materials, its time to replace the tire.
Check the ground contact area
This goes hand-in-hand with checking tire pressure regularly, Harris says. When we look at an ag tire, the tread bars are what develops traction in the field. If we overinflate a tire, we won't be able to get a full bar width as that tires making its footprint. If parked on a flat, hard surface, one of the tire bars at the 6 oclock position should be making contact from the center to the edge of the tire. Harris cautions this is only a visual inspection and doesnt take the place of regularly checking tire pressures and making adjustments depending on activity.
Check those valve stems and keep them covered
The valve is the main conduit keeping air in the tire. Keeping it clean is the first step, and that includes keeping the valve cover on. Its seems obvious, but we often get busy and forget, Harris says. We have to remember that the valve is keeping the air in, so when were operating in the field if it is exposed there is an opportunity for dirt to pack in there and actually push the valve stem down, causing a slow leak.
Also check the valve core itself. Sometimes the lock nut and the valve core can loosen during normal operation. I always encourage customers at the beginning of the year to take a wrench and secure the lock nut. And then just take a pair of pliers and make sure the valve core snug so we dont have any leakage in that area, Harris says.
Check all nuts and bolts to ensure they are tightened properly
Make sure than all hardware is properly torqued and connected to the wheel assemblies. During normal operation these parts are subjected to a lot of vibration. Harris says producers using heavy wheel weights should also ensure everything is tightened down properly before heading to the field. The last thing you want is a 1,000-pound wheel weight falling off in the middle of a field, he says.

